Tesseract Library Configuration

Tutorial for Installing Tesseract

You’ve undoubtedly seen it before… It’s widely used to process everything from scanned documents to the handwritten scribbles on your tablet PC and Google Translate. And today you’ll create your first app for text recognition.

What is OCR?

Optical Character Recognition, or OCR, is the process of electronically extracting text from images and reusing it in a variety of ways such as document editing, free-text searches, or compression. In this tutorial, you’ll learn how to install Tesseract, an open-source OCR engine maintained by Google.

How to Install Tesseract for Microsoft Visual Studio?

Step 1:

To install Tesseract you need to install the following programs:


git

https://git-scm.com/
 

slik-svn

https://www.sliksvn.com/en/download
 

visual-studio

https://www.visualstudio.com

Step 2:

What’s next? That’s right, create a folder where we want to install Tesseract. This can be any directory on your computer, for example: “D:\Tesseract-files”.
After that, run GIT CMD and move to Tesseract`s folder. Your GIT command line should look like this:

Installation Tesseract. Picture 1

Fig. 1. GIT CMD example

Step 3:

Now you need to copy the entire dependency from the GitHub repository to your computer. To do this, we write the following command in GIT CMD:
git clone git://github.com/pvorb/tesseract-vs2013.git. In the console GIT CMD you will see something like this:
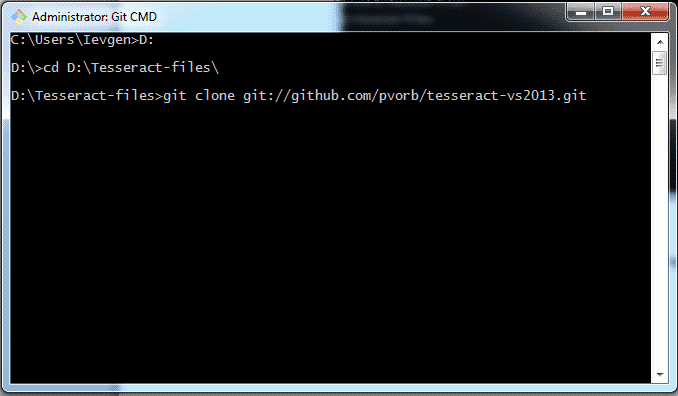
Installation Tesseract. Picture 2

Fig. 2. Clone tesseract-vs2013.git

After executing this command, you will see the following in the console:

Installation Tesseract. Picture 3

Fig. 3. Clone tesseract-vs2013 done

Step 4:

For the next step, run VS2013 developer command Prompt. It is in: {directory of MS VS}\Common7\Tools\Shortcuts\Developer Command Promt VS2013. And move to D:\Tesseract-files\tesseract-vs2013.
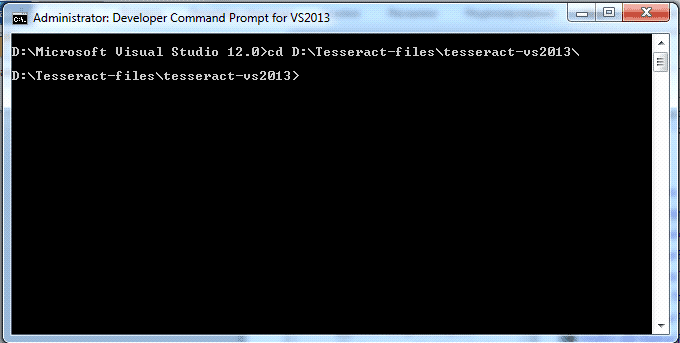
Installation Tesseract. Picture 4

Fig. 4. Command promt for VS2013

Now we can perform building using the command msbuild build.proj: 
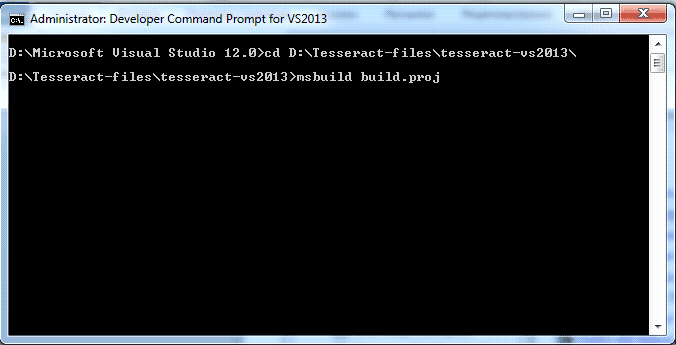
Installation Tesseract. Picture 5

Fig. 5. Start performing build

After this step, the VS2013 can be closed.

Step 5:

Reopen GIT CMD and check folder and check the working directory. Must be “D:\Tesseract-files\”.  After that, gets the latest source using SVN (print in GIT CMD):   svn checkout https://github.com/svn2github/Tesseract.git.
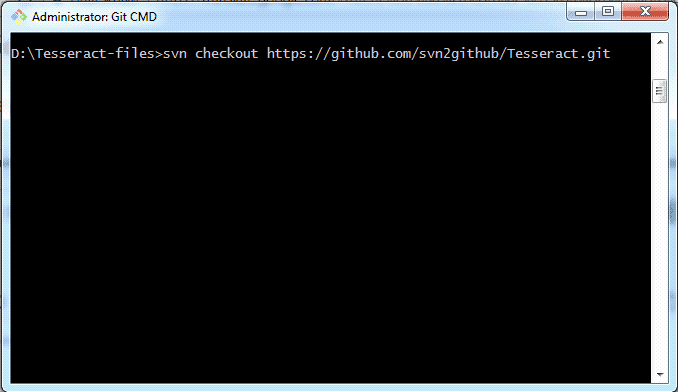
Installation Tesseract. Picture 6

Fig. 6. Checkout Tesseract

After performing this procedure, the new folder appears in a folder D:\Tesseract-files\ which name is Tesseract.git\.
Move in GIT CMD to D:\Tesseract-files\Tesseract.git\trunk and apply the patch provided in tesseract-vs2013 (print in cmd): svn patch D:\Tesseract-files\tesseract-vs2013\vs2013+64bit_support.patch
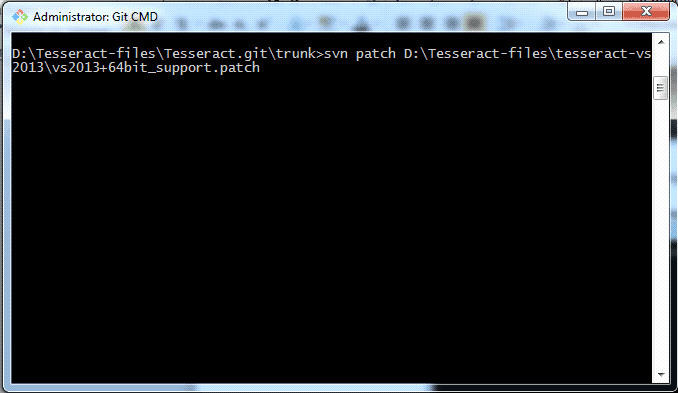
Installation Tesseract. Picture 7

Fig. 7. Patch provided in tesseract-vs2013

Copy both directory (lib and include) from D:\Tesseract-files\tesseract-vs2013\release into D:\Tesseract-files\Tesseract.git\trunk\
Open D:\Tesseract-files\Tesseract.git\trunk\vs2013\tesseract.sln with Visual Studio 2013.

Step 6:

Open Property pages of libtesseract304 and in Configuration Properties->C/C++->General->Additional Include Directories  add D:\Tesseract-files\Tesseract.git\trunk\include\  and D:\Tesseract-files\Tesseract.git\trunk\include\ leptonica\; In Property  pages open Linker->General->Additional Library Directories add D:\Tesseract-files\Tesseract.git\trunk\lib\x64\;
It is necessary to repeat this operation for Debug and Release. Build the project in Release and Debug.

Step 7:

What would Tesseract recognized the text he needs training files. They can be found in: https://github.com/tesseract-ocr/tessdata. Download the necessary files and copy them to D: \Tesseract-files\Tesseract.git\trunk\ tessdata\

Step 8:

Copy tesseract`s .dll files to necessary project from D:\Tesseract-files\Tesseract.git\lib copy libtesseract304.dll (or libtesseract304d.dll) to Release (or Debug) folder in necessary project (In this folder must be exe file).From D:\Tesseract-files\tesseract-vs2013\lib\x64 (or X64) copy liblept171.dll (or liblept171d.dll) to Release (or Debug) folder in necessary project (In this folder must be exe file).

Connect Tesseract into project (is necessary for Debug and for Release).

Set properties of necessary project:

  in C/C++ –> General –> Additional Include Directories:
D:\Tesseract-files\Tesseract.git\trunk\
D:\Tesseract-files\Tesseract.git\trunk\ccmain
D:\Tesseract-files\Tesseract.git\trunk\ccstruct
D:\Tesseract-files\Tesseract.git\trunk\ccutil
D:\Tesseract-files\Tesseract.git\trunk\leptonica
D:\Tesseract-files\Tesseract.git\trunk\api
D:\Tesseract-files\Tesseract.git\trunk\include

In Linker –> General –> Additional Library Directories:
D:\Tesseract-files\Tesseract.git\lib\x64
D:\Tesseract-files\Tesseract.git\lib\

In Linker –> Input –> Additional Dependencies:

for Debug

libtesseract304d.lib
liblept171d.lib

for Release

libtesseract304d.lib
liblept171d.lib.

Step 9:

So, create new console application and paste this code:

#include “baseapi.h”

#include “allheaders.h”

int main()

{

                char *outText;

                tesseract::TessBaseAPI *api = new tesseract::TessBaseAPI();

                // Initialize tesseract-ocr  with English, without specifying tessdata path

                if (api->Init(“D:\\Tesseract-files\\Tesseract.git\\trunk”, “eng”)){

                               fprintf(stderr, “Could not initialize tesseract.\n”);

                               exit(1);

                }

                // Open input image

                Pix *image = pixRead(“yout_image.tif”);

                api->SetImage(image);

                // set list of allowed characters

                api->SetVariable(“tessedit_char_whitelist”, “abcdefghijklmnoprstuvwxyzABCDEFGHIJKLMNOPQRSTUVWXYZ-.;,:/0123456789”);

                // Get OCR result

                outText = api->GetUTF8Text();

                printf(“OCR output:\n%s”, outText);

                // Destroy used object and release memory

                api->End();

                delete[] outText;

                pixDestroy(&image);

return 0;

}

Then build and compile the project.

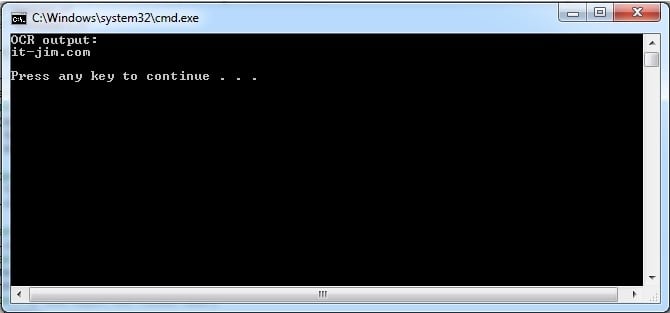
As a result, you will get:
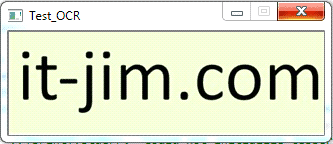
Installation Tesseract. Picture 8

Fig.8. Input image


Installation Tesseract. Picture 9

Fig. 9. Output result


Congratulation! You installed and started your first text recognition program!
Automatic Number Plate Recognition (ANPR) Systems

Currently, the number of cars in the world is well over 1 billion. It is no wonder that one of the most common computer vision tasks is the effective control of these vehicles through automatic number plate recognition (ANPR) systems. The applications of automatic vehicle number plate detection and recognition vary depending on the area of use and include, among others, border control, stolen car detection, automatic ticketing of vehicles and toll collection, traffic monitoring and safety control, smart parking, tracking of transportation, etc.

A typical automatic number plate recognition algorithm includes several steps (Fig. 1): car license plate detection (1), character segmentation (2) and recognition (3).

Vehicle number plate recognition algorithm
Fig. 1. Main steps of ANPR

Within this vehicle number plate recognition project, we concentrated on the first step of the algorithm: locating the area on the image that corresponds to the license plate number. It is indeed a crucial step of the whole recognition pipeline since it strongly affects the overall system performance.

As the first step of the project, we extracted the plate candidates areas based on the following two approaches:

  • stroke width transform (SWT), which was used to locate the image regions containing the text);
  • blob detection algorithm, which increased the final detection rate.

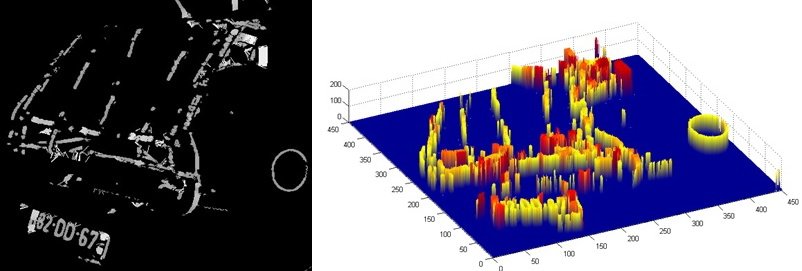
The SWT is a well-known text detection algorithm. The idea lies behind the careful analysis of the image edge map and local gradient directions. The basic preparation steps include the calculation of the Sobel gradients and Canny edge map construction.

The results of SWT application to the image and its 3D view are illustrated in Fig. 2.

                                                                                     Car plate recognition system - SWT algorithm

Fig. 2. SWT image example

Read also:

Road Detector

To locate the text region on the image, which corresponds to the vehicle number plate, we proceed with the following steps:

License Plate Recognition - Steps

To increase the rate of the vehicle number plate detection, we have additionally integrated the blobs analysis procedure, which is based on morphological operators and contours calculation and applied to the preprocessed images. Fig. 3 illustrates an example of found number plate candidates using the developed method.

license plate recognition - an example of using the method

Fig. 3. Detected blobs and bounding boxes

The combination of SWT and blob detection approaches returns the list of the number plate candidates. The final step of the project was to extract the true car license plate area.

For this, we used a 3-layer perceptron neural network (NN) which classifies the obtained sequence of number plate candidates. The NN was trained using different sets of features including:

  • Haar-based features (based on integral images);
  • statistical features (mean, std, skewness);
  • principal component analysis (PCA) features.

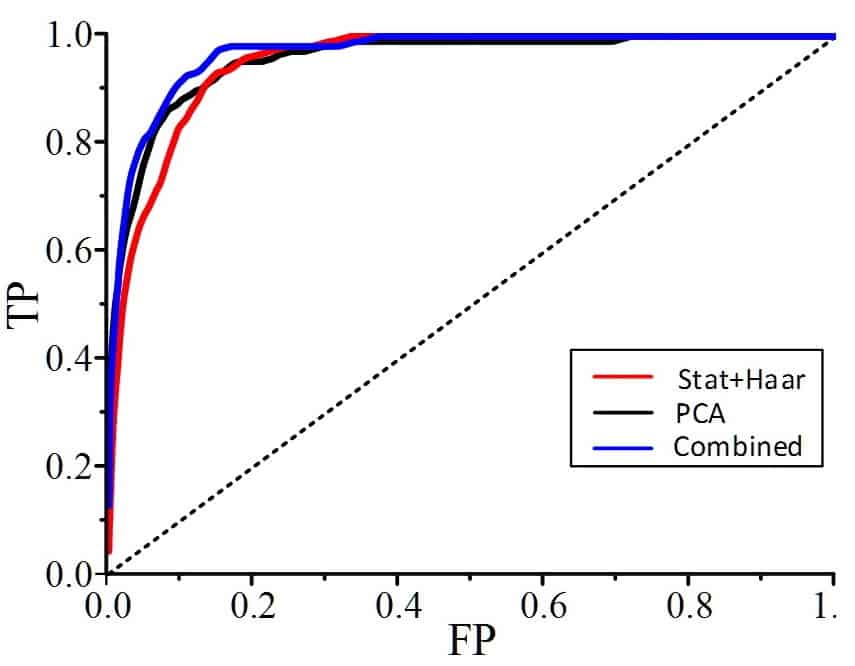
Fig. 4 demonstrates an example of the obtained receiver operating characteristics (ROC) curves for three different learning scenarios. The ROC curve represents the dependence of true positive rate (TP) on the false positive rate (FP).

Number plate identification system - ROC curves
Fig. 4. ROC curves for different sets of features

The best classification results are obtained when using a combination of all three groups of features for NN training.

Our paper which describes the above-mentioned results in more detail was presented at the Signal Processing Symposium 2015 where it received the 1st prize for the best publication.

The ANPR pipeline discussed in this post is an open-ended research task and all steps can be further improved, however, it proves that CNN is not the only solution for solving such kind of tasks.

Road Detector

Automatic road detection algorithm - Computer vision engineering company It-Jim

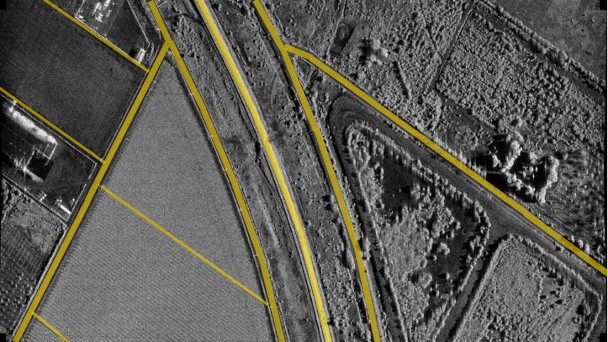
Our task was to develop the algorithm for the automatic road detection in radar images. The challenge was that the radar images are a bit different from the optical ones. In particular, in the case of synthetic aperture radar (SAR), the image formation process is accomplished via coherent processing of the received signals backscattered from the Earth surface. As a result, the multiplicative speckle noise appears in the SAR images.  Continue reading “Road Detector”

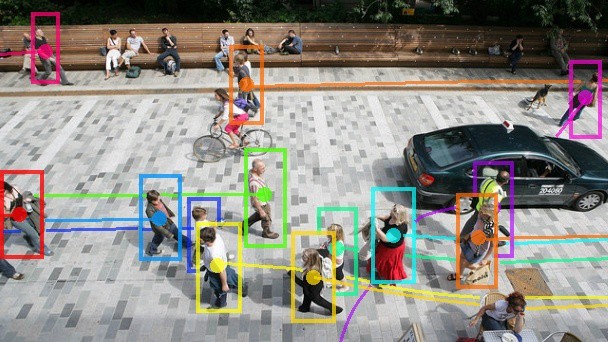
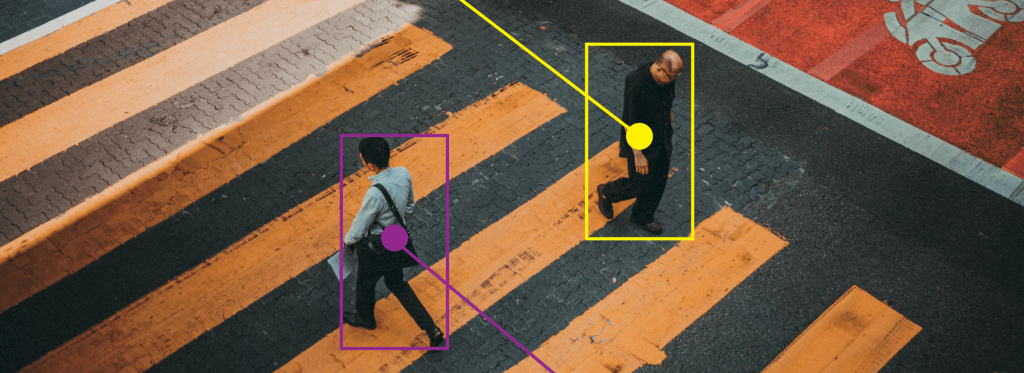
People Tracker

Systems and applications for detecting and tracking moving objects, whether people, vehicles, or anything else, are currently in heavy demand. Such tracking is widely used in security and surveillance, military, entertainment, sports, medical imaging, as well as for augmented reality and robotics. In the case of people trackers, many businesses need AI-powered systems tailored for locating, monitoring, counting and analyzing human flows and behavior. This particular case is of great interest for passenger traffic in airports, public transportation, in-store analytics in retail and public facilities. Applying such tracker devices and apps to track people’s location in shopping malls helps businesses to achieve success through customer insights thus improving considerably shopper experience and driving revenue.

Project Description

The aim of this was to develop a system for the analysis of the human activity in supermarkets. In particular, we needed to

  • cluster the regions of interest (ROI),
  • detect, track and count people.

The basic scheme of the “People Tracker” framework is presented in Fig.1:

Fig. 1. System modules


The video import module was used for the proper transferring of inputs (either saved video or live streams). All metadata was extracted for other modules. 

The ROI detection module was used for the automatic extraction of store areas with human activity.

   App for tracking people. Picture 1    App for tracking people. Picture 2

Fig. 2. Example of video frame and K-means application

In order to extract ROIs, we have extracted each cluster data separately and applied contour detection. Fig. 3 illustrates the sequence of the binary images corresponding to the K-means clusters:

Tracking device for people

Fig. 3. Data from K-means clusters

Since the clustering of ROIs has been performed using color-based segmentation, there is an evident problem of various shop obstacles obstructing the view of the floor in some situations. In order to make the algorithm more generic, we proposed to track people’s activity and store their trajectories. As a result, these trajectories can be drawn as a point cloud which can be clustered by the same K-means algorithm. Fig. 4 illustrates an example of a video frame with such a point cloud and the ROIs detected.

   App for tracking people. Picture 3    App for tracking people. Picture 4

Fig. 4. Example of a video frame and K-means application

(left – frame with the point cloud, right – detected ROIs)

Each point in the cloud corresponds to the position of the trajectory of an arbitrary person. The extracted points are automatically clustered resulting in the detected human activity areas.

Below you can see a short video sample demonstrating the developed “People Tracker”.

Summary

Being an important domain in computer vision, moving object tracking has a wide variety of applications. Here we have demonstrated our solution to track people inside supermarkets using the K-means clustering algorithm.