GStreamer for Computer Vision and Audio Processing

You might have heard of something called “GStreamer”. I know what you think. This is some old and boring geek-and-nerd stuff from Linux, right? But what is it? What is the use of GStreamer? If we want computer vision or audio (speech, music) processing, can GStreamer help us?

In this article, I’ll try to answer these questions. This article is beginner-level and assumes no or little previous experience with GStreamer. But I assume that you are interested in computer vision and/or audio processing and know at least a little bit of C++ (for this GStreamer tutorial).

What Is the GStreamer Library?

So, what is GStreamer? The official documentation calls it an “open-source multimedia framework” and gives the following definition:

GStreamer is a library for constructing graphs of media-handling components. The applications it supports range from simple Ogg/Vorbis playback, audio/video streaming to complex audio (mixing) and video (non-linear editing) processing.

Applications can take advantage of advances in codec and filter technology transparently. Developers can add new codecs and filters by writing a simple plugin with a clean, generic interface.

Wikipedia gives the following definition:

GStreamer is a pipeline-based multimedia framework that links together a wide variety of media processing systems to complete complex workflows. For instance, GStreamer can be used to build a system that reads files in one format, processes them, and exports them in another. The formats and processes can be changed in a plug-and-play fashion.

GStreamer supports a wide variety of media-handling components, including simple audio playback, audio and video playback, recording, streaming and editing. The pipeline design serves as a base to create many types of multimedia applications such as video editors, transcoders, streaming media broadcasters and media players.

GStreamer is over 20 years old, and might not be the current “hot topic”. However, as we will see below, it’s very important for computer vision, especially at the “professional” and “deployment” levels, when you progress beyond toy demos and suddenly start to discover that the “real world is not that simple”.

GStreamer is a part of the GNOME project (like in the “GNOME desktop”), and while I (as an experienced Linux user) personally strongly prefer the KDE desktop to GNOME desktop, GNOME libraries are very nice. Note that GStreamer is also used by the Qt GUI library and thus KDE desktop.

Some people would think that the word “stream” in GStreamer means network streaming. This is not so. Its primary function is to build local pipelines. However, GStreamer does have plugins for network streaming protocols like RTSP and it is frequently used for designing RTSP server or client applications.

Languages and Platforms

GStreamer is most commonly found on Linux. However, it’s a cross-platform C library available on all major platforms (Windows, MacOS, Android, iOS, etc.). Note that “Linux” includes “web back end”, “embedded” and “single board” (Raspberry Pi and friends) among other things. The only platform I couldn’t find a pre-built GStreamer for is Web Browser (WASM). Not that it’s impossible in theory, but probably nobody wanted such a heavyweight monster on a very restrictive WASM platform. GStreamer is a huge framework, it has tons of dependencies, and you should never try to build it from the source unless you have no choice.

GStreamer’s native language is C (not C++). It can be directly called from C++ or Objective C. For other languages (Python, Java, etc.), you have a choice of either adding some C++ to your code via language interfaces (such as pybind11 or JNI) or using a GStreamer wrapper for your language. They generally exist but might be out of date and not support the latest GStreamer versions.

A C++ wrapper, gstreamermm, with nice C++ classes, used to exist, but unfortunately, it is not supported anymore.

Python GStreamer wrappers are popular, but again, compared to C/C++, they tend to use outdated versions (sometimes even 0.1 instead of 1.0).

To get the most out of GStreamer, and to understand it fully, you should use it in C or C++ (and not Python or other languages). This is what we will do in this C++ tutorial.

What Is the Use of GStreamer? 

GStreamer has many uses, but we are interested in computer vision and audio processing,  right? How can GStreamer help us?

Imagine the following situation. You are writing an application that processes a video or audio. You need some library that would encode and decode audio and video in various codecs and formats so that you can process raw video or audio in your code. Or maybe you want something even funnier, like integrating your algorithms with RSTP streaming, web back end, or building sophisticated real-time pipelines. Can we do that?

Wait, weren’t there C libraries for different codecs, like libx264 or libaac? Yes, but there are dozens of codecs and containers, each with its own library, with its own unique API, often clunky and unlike all other APIs. Unfortunately, the end users tend not to care about this fact, they expect your application to work with any audio or video format that exists and will be really surprised and frustrated if it doesn’t. Do you really want to code the low-level logic of decoding various file formats with about 20 various libraries like libx264? Probably not. What we want is “one library to rule them all”. We want a C/C++ library that would work with a large number of audio and video formats and codes. This is harder than people often think.

Before giving you the answer, let’s mention a few options that do NOT work:

OpenCV is not a good choice, see the section on GStreamer and OpenCV below.

Beginners often tend to avoid this issue by preprocessing the input data. For example, you can open your input video file in a video editor (or, for nerds, with ffmpeg in terminal), extract the audio track as an uncompressed WAV, and then read your video with OpenCV, and your audio with libsndfile. Is it possible? Yes, and it can be sometimes justified for early R&D work. Is it a good idea? Definitely not if you want a finished product or a nice demo.

Often people try to use FFMpeg (or GStreamer) in terminal, shell scripts, python system() function, or pipes like ffmpeg <some options? | python3 mycode.py, but this is really not much different from the previous option.

Now, the options that DO work.

GStreamer vs FFmpeg

Some operating systems (like Android and Windows) have their own OS-specific codecs API, often somewhat limited in formats supported, but in the worlds of Linux and cross platform there are basically only two good choices: FFmpeg and GStreamer. And “cross platform” means you can port your software everywhere (nice !), while, once again, “Linux” means “back end+embedded” (plus I just love Linux and use it for work). Nowadays, with things like AWS and Azure and Docker, Linux finally really moved from the geek-land into the mainstream.

So, FFmpeg and GStreamer, but which of the two is better? Both libraries will do the job. Both libraries are “umbrellas” over multiple low-level libraries like libx264. Both libraries support (at least in theory) various hardware video accelerators and hardware-oriented specs like Video4Linux 2 (used for e.g. camera feed). And GStreamer is not independent of FFmpeg, in fact, it uses FFMpeg for some codecs (“av” prefix in GStreamer element names like avdec_h264 means FFmpeg).

The two libraries have, however, rather different philosophies. FFmpeg has only low-level encoding-decoding operations, while GStreamer allows you to design and play sophisticated media pipelines. Both are very nice, definitely try FFmpeg (C API) if you haven’t already, but this article is about GStreamer. How do I choose between the two? If you only want encoding-decoding and you are prepared to micromanage the whole pipeline (no easy task!), choose FFmpeg. If you want a pipeline-building library, definitely choose GStreamer. Also, GStreamer has many nice extras, from RTSP streaming to video special effects.

To summarize, there are the main reasons to use GStreamer in your computer vision or audio processing code:

  1. Encoding and decoding a great number of audio and video formats (practically all that exist)
  2. Building sophisticated media pipelines
  3. Using GStreamer extras (network streaming, filters, media playback, etc.)
  4. Using GStreamer-based third-party frameworks like Nvidia DeepStream or GstInference

Interlude: on Codes and Containers

Audio and video tracks found in media files and streams are typically highly compressed using codecs, such as H265, VC9, or AC3. Encoded data is created from the raw data using encoders, and converted back to raw with decoders.

However, what if we want to put several media tracks into a single file? For example, one video track, several audio tracks (in different languages), and subtitles. Then you will need containers (or formats) such as AVI, QuickTime or MKV. Containers are created by muxers (which join media tracks), while the reverse operation of unpacking a container into separate tracks is performed by demuxers. Most modern media file formats (except for a few simplest ones: WAV, MP3) are containers.

Please do not mix up codecs with containers, they are two different things! For example, OGG is a container, while Vorbis is the codec most often used in OGG. An AVI container can contain a video in H264 or H265, and an audio in AC3 or AAC, or many other codecs.

How Do I Learn GStreamer?

Start with the official documentation. Seriously. It has a tutorial and a manual. There is nothing better. However, it only briefly touches on the topic which is of utmost importance to us: appsrc and appsink elements, or “Short-cutting the pipeline”. You can find numerous examples with appsrc and appsink on GitHub, but I didn’t find any good introductory tutorial on this topic, vital for audio and vision. Thus I wrote my own GStreamer tutorial in C++, and I will briefly cover it in the last section of this article. It also includes various appsrc and appsink examples, including “GStreamer+OpenCV” examples, showing how to use GStreamer and OpenCV in the same code.

GStreamer Pipeline Tutorial

How Does GStreamer Work?

It is covered pretty well in the official tutorial, so I’ll give only a very brief introduction. The basic GStreamer object is a pipeline (Fig. 1).

Fig. 1. GStreamer pipeline, from the official tutorial

It is built from elements (large boxes in Fig. 1), the GStreamer LEGO blocks, which have input-output ports called pads (small blue boxes). The pads can be linked together. The pipeline has a state (PLAY, PAUSE, READY, NULL, VOID_PENDING). When the pipeline is playing, it does so automatically, in multiple threads created by the GStreamer library.

When you try to link two pads, they negotiate, i.e. try to agree on a common data format, fixing all the little details like frame size, fps, etc. If they fail, the pipeline gives an error. Negotiation in GStreamer is based on capabilities or caps, for example (Note: they are NOT MIME types !):

video/x-raw,format=BGR,width=720,height=576

or

audio/x-raw,format=S16LE,layout=interleaved

for RAW (unencoded) video or audio data respectively. If negotiation fails, you can often fix it by inserting intermediate elements such as videoconvert, audioconvert and audioresample.

GStreamer in Terminal

While for “serious” GStreamer usage you need C or C++, nothing stops you from trying it out using GStreamer console tools. It will help you understand GStreamer basics and learn pipeline syntax and common elements. If you are reading this, we strongly encourage you to install GStreamer on your computer, download a few small audio and video file samples, and try out examples from this chapter. It’s good fun! Once again, the official documentation covers the “console GStreamer” rather well, so I will briefly show a few examples of my own that I find illustrative. The main tools are:

  • gst-launch-1.0 : Create and launch a GStreamer pipeline, our main tool
  • gst-play-1.0 : Play a media file (a minimal video player)
  • gst-inspect-1.0 : Inspect available GStreamer plugins
  • gst-discoverer-1.0 : Examine a media file, print information on codecs, etc.

Without further ado, let’s buy popcorn and start playing with GStreamer. gst-launch-1.0 receives a single argument: a text string describing the GStreamer pipeline. The syntax is simple: a number of GStreamer elements with optional options (pun intended). The neighboring elements are separated with either exclamation sign ‘!’ when they are linked, or space ‘ ‘, when they are not.

The simplest pipeline uses playbin, a high-level media playback element:

gst-launch-1.0 playbin uri=file:///home/seymour/Videos/suteki.mp4

It needs a URI (network URL or a full path to a file).

Elements audiotestsrc and videotestsrc create simple test videos. Elements autoaudiosink and autovideosink play the video (screen window) and audio (speakers) respectively on your computer. On some platforms they could be restricted in caps they accept, so it’s always a good idea to put conversion elements in the middle:

gst-launch-1.0 audiotestsrc ! audioconvert ! audioresample ! autoaudiosink

gst-launch-1.0 videotestsrc ! videoconvert ! autovideosink

gst-launch-1.0 videotestsrc pattern=18 ! videoconvert ! autovideosink

Conversion elements can do simple format conversions like YuV to RGB video, or int16 to float32 audio, for raw audio or video only (NOT codecs). audioresample can resample the audio to a new sampling rate (e.g. from 16000 to 44100 Hz).

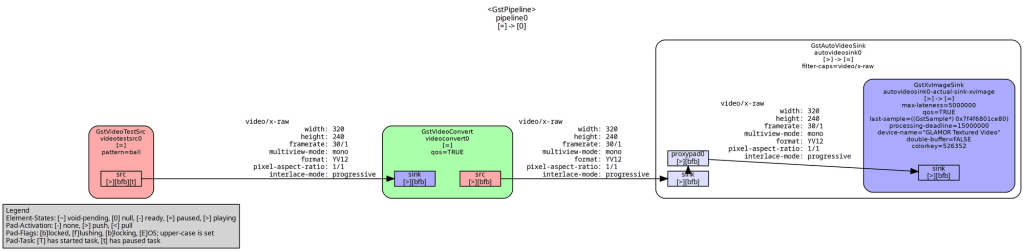
The GStreamer pipeline can be visualized using GraphViz software. Type in the console:

GST_DEBUG_DUMP_DOT_DIR=. gst-launch-1.0 videotestsrc pattern=18 ! videoconvert ! autovideosink

It will create a number of .dot files in the current directory (‘.’). Choose the one named “….PAUSED_PLAYING.dot”. The result is shown in Fig. 2 (such figures tend to be cluttered with details).

Fig. 2. A GStreamer pipeline visualized by GraphViz.

Branched Pipelines

You can create branched pipelines in GStreamer. The first type of branching happens when you duplicate a data stream with the tee element:

gst-launch-1.0 videotestsrc ! videoconvert ! tee name=t ! queue ! autovideosink t. ! queue ! autovideosink

It creates two windows with identical videos. Note how we name the tee element as t (any name could be used instead of t, e.g. cyberdemon), and then put space and not ! after autovideosink (no linking), then start another branch with t. (go back to the element named t, and try to link its other still unlinked pad). This pipeline is shown in Fig. 3.

Fig. 3. A branched pipeline visualized by GraphViz.

Another type of branching happens if an element has two or more source (output) pads with different media tracks. For example, let’s take high level decoding elements decodebin and uridecodebin. They behave similarly, except that decodebin receives data from a sink (input) pad, while uridecodebin receives data from a URI. So the two lines are very similar

uridecodebin uri=<file name>

and

filesrc location=<file name> ! decodebin

except the first one requires a full path. Let’s try to play a media file with uridecodebin:

gst-launch-1.0 uridecodebin uri=file:///home/seymour/Videos/suteki.mp4 name=u ! audioconvert ! audioresample ! autoaudiosink  u. ! videoconvert ! autovideosink

Once again, you have two branches after uridecodebin:

uridecodebin ! audioconvert ! audioresample ! autoaudiosink
                        ! videoconvert ! autovideosink  !

This pipeline behaves similarly to playbin. uridecodebin is a high-level element, which automatically creates a sub-pipeline with appropriate demuxer and decoders.

Can we go to a really low level? Yes, but there is usually no need to. We can inspect our file with gst-discoverer-1.0 or ffplay. If we know that suteki.mp4 is a QuickTime file with AAC audio and H264 video, we can then play it with:

gst-launch-1.0 filesrc location=suteki.mp4 ! qtdemux name=d ! avdec_h264 ! queue ! videoconvert ! autovideosink d. ! avdec_aac ! queue ! audioconvert ! audioresample ! autoaudiosink

Here the two branches are:

filesrc  ! qtdemux ! avdec_h264 ! queue ! videoconvert ! autovideosink

                               ! avdec_aac ! queue ! audioconvert ! audioresample ! autoaudiosink

We see demuxer and decoders, and a new element queue. Note that the queue in GStreamer is called queue, while the word “buffer” means something completely different (I’ll get back to it eventually). It’s always a good idea to use queue in branched pipelines to avoid a possible deadlock, when synchronizing tracks on playback or especially muxing, as GStreamer does not check for deadlocks. 

Now let’s try encoding. Now you have no choice but to go to the low level: encoders+muxer, sometimes also parser.

Video:

gst-launch-1.0 videotestsrc ! videoconvert ! x264enc ! avimux ! filesink location=out.avi

gst-launch-1.0 videotestsrc ! videoconvert ! x265enc ! h265parse ! matroskamux ! filesink
            location=out.mkv

gst-launch-1.0 videotestsrc ! videoconvert ! vp9enc ! webmmux ! filesink location=out.webm

Audio:

gst-launch-1.0 audiotestsrc ! audioconvert ! wavenc ! filesink location=out.wav    

gst-launch-1.0 audiotestsrc ! audioconvert ! lamemp3enc ! filesink location=out.mp3 

gst-launch-1.0 audiotestsrc ! audioconvert ! vorbisenc ! oggmux ! filesink location=out.ogg 

gst-launch-1.0 audiotestsrc ! audioconvert ! avenc_wmav2 ! asfmux ! filesink
          location=out.wma 

And now the hardest case. Let’s decode and re-encode:

gst-launch-1.0 filesrc location=zoryana.webm ! decodebin name=d ! queue ! audioconvert ! avenc_aac ! avimux name=m ! filesink location=out.avi d. ! queue ! videoconvert ! x264enc ! m.

What was that? A pipeline with splitting and merging branches!

filesrc ! decodebin ! queue ! audioconvert ! avenc_aac ! avimux ! filesink

                                 ! queue ! videoconvert  ! x264enc    !

Pipeline Tricks, GStreamer Real-Time vs. Offline Pipeline

There are a couple of extra tricks when designing pipelines. If there are multiple pads, the first suitable one is linked. This is not always desired. We can specify the pad name explicitly for linking, but only if we know the pad’s name, e.g. video_0 in demuxers:

gst-launch-1.0 filesrc location=zoryana.webm ! matroskademux name=d d.video_0 ! vp9dec ! videoconvert ! autovideosink

The second trick is the caps filter. If we write caps instead of an element between the two ! signs, then we force the negotiation process to only accept caps compatible with the specified caps. We can often use it to control elements that we cannot control directly, for example:

gst-launch-1.0 videotestsrc ! video/x-raw,format=BGR,width=1024,height=768 ! videoconvert ! autovideosink

Here the caps filter affects the negotiation between videotestsrc and videoconvert. videotestsrc cannot be programmed directly, but it is rather flexible at negotiations, and here we force it to produce 1024×768 BGR video. Similarly, It can be used to explicitly control the conversion elements, if we want to convert the media into a different sampling rate, frame size etc. Later we will work with appsrc and appsink. They can be configured with either direct caps (preferred) or a caps filter.

The final trick is the sync option, present in most sinks, including autovideosink and appsink. Try the following pipeline:

gst-launch-1.0 filesrc location=suteki.mp4 ! decodebin ! videoconvert ! autovideosink sync=true

This is the default. sync=true means that autovideosink plays the video stream at the 1x speed, provided that it has correct timestamps, actually in this case autovideosink sets the pace of the entire pipeline, as decodebin could decode the file much faster on modern computers. This is the GStreamer way of creating a real-time pipeline.

Now try to change to sync=false and see what happens (laughing smiley) !

If, on the other hand, we used a filesink, like in the re-encoding example above, it has sync=false by default. The pipeline plays as fast as it can (depending on processing speed), usually much faster than 1x. This is the offline file processing, GStreamer way.

The sync option is important for appsink, depending on our computer vision application, both choices make perfect sense.

In this section, I will cover a few topics which are neither “GStreamer in terminal” (previous section) nor “GStreamer in C/C++” (next section).

Does OpenCV Use GStreamer? A Tricky Relationship between the Two Libraries

Remember, I promised to explain why OpenCV, a popular computer vision library, is not good for reading and writing video files with VideoCapture and VideoWriter respectively. First, and this is the main reason, OpenCV cannot work with audio tracks at all. Second, it is rather inflexible, for example, try to encode into memory and not a disk file, you cannot! Third, depending on how OpenCV is built, it might have very limited codec support or none at all. There are no guarantees. For example, on modern Ubuntu, apt-installed OpenCV (for C++) is pretty good, while pip-installed Python OpenCV has very limited encoding capabilities.

How does OpenCV work with videos? It uses various backends, which at least for Linux usually means (surprise, surprise) either FFmpeg or GStreamer. And a couple of years ago Ubuntu switched from FFMpeg to GStreamer (1:0 for the latter !). If you are using OpenCV video I/O, you are actually using FFmpeg or GStreamer, why not cut the middle person?

There is another topic worth mentioning here, GStreamer in OpenCV. If (and only if) OpenCV was built with GStreamer, you can use GStreamer pipeline strings instead of file names in OpenCV VideoCapture and VideoWriter, terminated with appsink or appsrc respectively. It is discussed a lot in places like Stack Overflow, however, I don’t find the idea especially good. While it can slightly expand OpenCV powers with things like RTSP, you still cannot have audio or pipelines with multiple sources/sinks or anything complicated.

A much better way to combine GStreamer with OpenCV (in my opinion) is presented in the next section. With appsink and appsrc, you can move the raw pixels back and forth between your C++ code and GStreamer pipeline. Once the frame is in your C++ code, you can do anything you want with it. For example, wrap it with OpenCV’s cv::Mat, process it with OpenCV, and send the result back to GStreamer. Or, run a neural network inference or any computer vision code you want.

GStreamer and Deep Learning

Nowadays, “computer vision” and “audio processing” very often means “deep learning”. Owing to Deep Learning (DL) popularity, a number of plugins and frameworks have been proposed to run a neural network inference within the GStreamer pipeline.

  • Nvidia Deepstream
    https://developer.nvidia.com/deepstream-getting-startedThis is an Nvidia GPU-only Video Deep Learning framework based on GStreamer. Apart from neural network inference with TensorRT, it also supports Nvidia accelerated encoding+decoding, with an option to run the entire pipeline on the GPU. It is Linux-only and requires strict CUDA and CuDNN versions, better run it in Docker if you want to try. It also runs on Nvidia Jetson devices.
  • GSTInference
    https://nnstreamer.ai/
    A GStreamer framework based on R2Inference, which supports inferences with a number of DL frameworks, such as TFLite.

Note that you don’t have to use any of these frameworks to do neural network inference, you can always move data to your code with appsink and appsrc, and run the inference yourself in your own C++ code (or even in Python code for this matter), enjoying the total programmatic control over how you do the inference and visualization.

GStreamer vs Google MediaPipe

Here I compare GStreamer to another pipeline library, Google MediaPipe. I happened to play with both libraries in C++, and previously wrote a MediaPipe article (part1, part2, part3) in this blog. Let us now compare the two libraries (this is partly my subjective experience). At first glance, the two libraries are similar, as they are both multi-thread pipeline libraries. However, if you dig deeper, you will see numerous differences.

  • Background: GStreamer is old and time-tested, part of GNOME. MediaPipe is relatively new, developed by Google.
  • Main Goal:  Rather different. MediaPipe is mostly about Deep Learning, while GStreamer is mainly about playback, streaming and re-encoding media.
  • Deep Learning:  MediaPipe can do Deep Learning with TensorFlow (Lite). It also has a number of pre-trained TensorFlow Lite-based “solutions”, and many people actually believe (completely mistakenly) that the “solutions” IS MediaPipe. GStreamer can only do DL with third-party frameworks.
  • Traditional audio and video processing (resampling, reencoding, resizing, filtering): GStreamer does these things much better and has a vast array of standard elements.
  • Languages: C with GObject for GStreamer, C++ for MediaPipe. Bindings for a few other languages are available, but you’ll need C++ to get the most out of both frameworks.
  • Platforms: All common platforms for MediaPipe, except WASM for GStreamer. However, you’ll have to build MediaPipe from the source in order to use it in C++.
  • Data: MediaPipe: handles arbitrary data, but two or three special classes are available for images and audio. GStreamer: Highly specialized for audio+video via the caps system.
  • Data formats and negotiation: GStreamer: a sophisticated caps system and a wide variety of formats. MediaPipe: very few formats and negotiation is virtually non-existent.
  • Codecs and containers: GStreamer: Pretty much all codecs and containers that exist are supported via plugins. MediaPipe: Limited support based on OpenCV + FFmpeg.
  • Video with audio tracks: GStreamer: It’s easy to read a video file and split it into audio + video data within the same pipeline, same with writing files. MediaPipe: I am not sure if it’s possible at all with standard calculators, probably not. In other words, it does not qualify as “one library to rule them all”.
  • Network streaming: GStreamer: has plugins for network streaming. MediaPipe: Does not (if I remember correctly).
  • Pipeline definition: GStreamer: text string or C++ code. MediaPipe: ProtoBuf text string.
  • Internal structure: MediaPipe is generally simpler and easier to understand and to micromanage and to write custom “calculators” (similar to GStreamer elements). For GStreamer, it is much harder to go “under the hood” and write custom elements. However, you can use apprsc and appsink, as explained in this article.
  • Timestamps and synchronization and real-time vs offline: In my opinion, MediaPipe does these things in a clearer and simpler way (offline by default), while in GStreamer default behavior depends on the sink used.
  • Queues:  MediaPipe by default uses unlimited queues at each pipeline link. In GStreamer, you have to always add queue elements manually, with a few exceptions like apprsc and appsink. GStreamer is prone to deadlocks if you are not careful.
  • Documentation and tutorials: Good for GStreamer, bad for MediaPipe. MediaPipe documentation touts the “solutions” and largely ignores the C++ API .
  • Bazel factor: MediaPipe requires Bazel to build itself AND your project and it is pretty much incompatible with the “normal” C++ world of CMake and make and apt-installed libraries. This is very inconvenient, and seriously limits the possible uses of MediaPipe. In contrast, GStreamer is easy to install (with apt in Ubuntu) and perfectly friendly to CMake and make and other build systems.

    All things considered, GStreamer is much easier to use in C++ projects due to the horrific “Bazel factor”. Otherwise, their goals and typical use cases are rather different.

Let’s Sum Up

So far, we have covered what GStreamer is, how it works, its use cases, and how to run it in the terminal. We have also explained the relationship between GStreamer and OpenCV, what options there are to run a neural network inference within the GStreamer pipeline and compared it with the Google MediaPipe library. Now, let’s do some coding – follow us to the GStreamer C++ tutorial!


GoodFirms: It-Jim Thrives by Focusing on the Intellectual Processing of Visual Information and Technical Solutions


It-Jim, founded in 2015 by a scientist, is now an R&D firm with 100+ successful projects in its portfolio and 10+ Ph.D.s on the team. The team offers consulting services and technical solutions in computer vision, image and signal processing, machine and deep learning, and augmented and mixed reality.

The company effectively caters to the needs of businesses from various industries and uses cutting-edge technologies to help them grow, thanks to experts in various disciplines such as physics, mathematics, radars, and biophysics on board.

What is unique about the team? A thorough understanding of image and signal processing theory, as well as advanced programming abilities. A combination of classical computer vision methods with various types of machine learning algorithms and cutting-edge deep learning architectures – this is exactly what is needed to deliver the best solution for a given problem based on available hardware and infrastructure. The experts develop a custom methodology for each client that perfectly meets the requirements and business needs, ensuring the robust performance of ML pipelines in production everywhere: mobile and embedded devices, cloud, and so on.

As a machine learning company, It-Jim has run 50+ ML and DL projects and constantly applies the latest achievements and state-of-the-art DL architectures in their research.

Thus, the team’s use of a pool of techniques to build various image processing solutions qualifies It-Jim as one of the top Artificial Intelligence companies in Ukraine on GoodFirms.

About the Author

Working as a Content Writer at GoodFirms, Anna Stark bridges the gap between service seekers and service providers. Anna’s dominant role is to figure out company achievements and critical attributes and put them into words. She strongly believes in the charm of words and leverages new approaches that work, including new concepts that enhance the firm’s identity.


Talented Researchers Form the Backbone of It-Jim’s Incredible Computer Vision and AI Offerings: Goodfirms Interview

It-Jim is a renowned artificial intelligence solutions provider offering a wide variety of services, including computer vision, image processing, signal processing, machine learning, and augmented and mixed reality solutions. So far, the company has 100+ successful projects in its portfolio and a highly efficient team comprising 10+ PhDs.

The GoodFirms team interviewed Ievgen Gorovyi, the CEO at It-Jim, to learn more about the company and its values.

“It-Jim is a Ukraine-based company with expertise in visual intelligence and signal processing solutions. The company’s experts possess Ph.D. degrees in various mathematical disciplines,” shared the CEO Ievgen Gorovyi. “We provide technical consulting, R&D, and custom software development services for image and video analysis issues.”

The Commencement Story

“After finishing my Ph.D. in image and signal processing, I started my career as a freelancer,”  Ievgen reveals. However,  his ambitions grew over time, and he built a company with a group of highly talented and intelligent people with an absolute focus on computer vision.

Ievgen’s team of scientists and developers is highly experienced in analyzing and researching and is backed by complex problem-solving abilities. They focus on quality solutions for multiple platforms and hardware, including mobile devices, embedded boards, and cloud-based distributed systems.

Core Focus: Strategy Development

Regarding his role in the company,  Ievgen shares that as a CEO, he focuses mainly on the strategic part: business development, anticipating the company’s growth path, analyzing trends, and more form an integral part of his profile that helps shape their ongoing growth strategy. He is also involved in technical and management-related tasks with multiple R&D and software development teams.

Business-Model

It-Jim’s business model consists of an in-house team of computer vision and deep learning engineers dedicated to researching, developing algorithms, and their deployment. A stickler for deadlines, the company makes sure to deliver quality solutions. The exceptional work offered by the company ensures accuracy and performance, coupled with clear communication and full-on collaboration.

Differentiating Factors

“Academic Excellence backed by solid commercial development experience in a highly complex domain such as AI makes our company stand out,” asserts Gorovyi.

In addition to the above, It-Jim offers a custom computer vision course for freshers.

The employees are chosen carefully because they work in a high-stakes arena. The junior developers often undergo two months of trainee program under the supervision of experienced professionals in this field.  This exposure allows newcomers to work on real projects during their training period.

The organization is well-focused on improving the Ukrainian CV community by providing internships and winter schools and delivering lectures to university students and IT professionals, allowing them to harness their profound skills.

The company caters to various industries:

  • Healthcare
  • Automotive
  • Entertainment
  • Sports analytics
  • Surveillance
  • Retail

Moreover, the company’s non-exhaustive service list is long. It includes customized computer vision development, software development, iOS, and web development, deep learning solutions and deployment, extended reality (XR) development, digital signal processing research, and, last but not least technical consulting.

Incredible Customer Satisfaction Rate

Customer satisfaction is essential to It-Jim’s worldwide success in the IT sector. “Let the clients do the talking for us,” says Ievgen.  It’s no wonder happy clients have left praises for the company on the GoodFirms platform, which in a significant way, vouches for their excellent project outcomes.

“Also clear communication, R&D reports of algorithm development, business analysis, excellent product development process, and post-project support helps us create solid relationships with our clients,” he asserts.

GoodFirms Verdict

According to GoodFirms’ reviewers and analysts, It-Jim has the best team of engineers and scientists who provides unmatched experiences for excellent software solutions through artificial intelligence technology, which endows It-Jim to be among Ukraine’s top artificial intelligence companies in GoodFirms listings.

Future Plans

It-Jim plans to be a leader in computer vision for 3d development in the next ten years. The CEO reveals that the company wishes to become Metaverse’s key partner or contributor and also offer AI-based products for society.

Besides, Ievgen hopes to leave a mark in the sophisticated computer vision space for Ukraine’s community and across the globe.

To read the detailed interview with Ievgen Gorovyi, you can check GoodFirms.

About GoodFirms

Washington, D.C.-based GoodFirms is an innovative B2B Research and Reviews Company that extensively combes the market to find business services agencies amongst many other technology firms that offer the best services to their customers. GoodFirms’ extensive research process ranks the companies, boosts their online reputation, and helps service seekers pick the right technology partner that meets their business needs.

About the Author

Working as a Content Writer at GoodFirms, Anna Stark bridges the gap between service seekers and service providers. Anna’s dominant role is to figure out company achievements and critical attributes and put them into words. She strongly believes in the charm of words and leverages new approaches that work, including new concepts that enhance the firm’s identity.

Apple RoomPlan API Integration for Innovative AR Apps

How to Integrate Apple’s RoomPlan API into Your iOS App: A Comprehensive Guide

Creating a 3D room model has historically been a lengthy, costly, and error-prone process. Real estate managers wasted hours and money hiring experts to make floor plans.

But here’s what changed everything: Apple introduced the RoomPlan API

Now, users can visualize rooms using their iOS mobile devices in just minutes with incredible detail. AR app developers, proptech startups, interior design platforms, e-commerce, and real estate professionals can benefit from the RoomPlan API.

“When comparing scan dimensions to actual measurements using Apple’s RoomPlan API, they turned out to be accurate enough, with an error usually staying below 5%. This level of precision makes it viable for many professional applications, from interior design to real estate documentation.”  

– Oleg Ponomaryov, CTO at It-Jim

This guide walks you through everything you need to know about integrating Apple’s RoomPlan API into your iOS app, namely:

  • What is Apple RoomPlan, and how does it work?
  • How to integrate Apple’s RoomPlan API into your iOS app.
  • Measurable benefits from the RoomPlan API integration.
  • Overcoming RoomPlan API limitations with proven workarounds.
  • Advanced use cases powered by It-Jim.

Let’s start by understanding how the Apple RoomPlan API works and its core properties.

What is the Apple RoomPlan API & Its Workflow?

Apple’s RoomPlan API is a framework that uses augmented reality (AR) and the LiDAR Scanner on iPhone and iPad to create 3D models of indoor spaces. This is part of ARKit for building AR apps and using the RoomPlan API.

LiDAR stands for Light Detection and Ranging and uses laser light to measure distances. The technology sends out beams and checks their reflections. RoomPlan API in iOS creates a parametric model that shows the positions and sizes of walls, doors, windows, furniture, and other appliances.

The RoomPlan functionality facilitates automatic object recognition, real-time 3D model reconstruction, and enables easy exports.

Here is a list of potential use cases of an AR app containing the Apple RoomPlan API:

  • Real estate: create virtual tours of properties and provide accurate floor plans.
  • Architecture: preview and change room layouts in real-time for faster design decisions.
  • Interior design: visualize how furniture fits in a room and plan renovations.
  • Facility management & Logistics: plan office layouts or maintenance paths, inventory space usage in commercial buildings
  • Home repair: estimate material needs for renovating projects and visualize the results.
  • Accessibility: help assess room layouts for mobility aids (e.g., wheelchairs), simulate navigation paths for accessible design compliance
  • Furniture retail: allows customers to visualize furniture in their homes.
  • Marketing: create engaging advertisements or digital promotions.
  • Insurance: provide accurate documentation of property layouts and valuable items used for insurance underwriting or claims processing.

Also, RoomPlan’s ability to generate accurate 3D models of indoor spaces makes it well-suited for emergency planning, evacuation modeling, and risk assessment in occupational safety contexts.


Thinking about building a custom AR app and integrating Apple’s RoomPlan API for your business?

Whether you’re building AR apps, using the RoomPlan API to visualize spaces, or creating digital property twins, unlock faster, more innovative development. We don’t just use RoomPlan API – we help enhance it with computer vision services. Reach out to ask questions and receive advice.

Feel free to contact us.


Why Apple’s RoomPlan Outperforms Traditional Methods

RoomPlan API in iOS outperforms older methods, such as Scene Reconstruction and manual CAD modeling. It offers faster results, better accuracy, and greater accessibility, all from one mobile device. Traditional 3D scanning produces unstructured point clouds or meshes.

In contrast, RoomPlan API generates a semantic understanding of interior spaces. Instead of just capturing shapes, it identifies and categorizes room elements. The API produces this comprehensive room data within minutes.

Additionally, previous methods required extensive technical expertise, specialized equipment, and considerable post-processing time. 

How Does the Apple RoomPlan API Work?

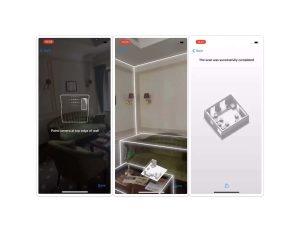
The process for using the RoomPlan API is straightforward: launch the app, follow the steps to scan the room, and review the results shortly thereafter. You can access and edit the 3D room model anytime.

Making a 3D room reconstruction with Apple RoomPlan API

So, how does Apple RoomPlan API work from a technical perspective?

In brief, the API workflow consists of these three main steps:

1. Scanning

The RoomPlan API uses the device’s camera and LiDAR scanner. It captures the environment and identifies key features: walls, windows, doors, and openings.

2. ML Processing

Sophisticated ML algorithms analyze the captured data to identify room features and create a 3D model of the room. 

3. 3D Output

The RoomPlan API in iOS gives results as parametric data. You can export this data in different Universal Scene Description (USD) formats. This property enables developers to easily add 3D models to their apps.

USD is a typical format for AR-based projects. You can edit these files later in tools like AutoCAD, Shapr3D, or Cinema 4D if needed.

RoomPlan API: Data Structure Overview 

Apple’s RoomPlan can recognize the following aspects of the captured room

  • Structural elements: walls, doors, windows, openings.
  • Furniture: chairs, tables, sofas, beds, storage units.
  • Room boundaries: floor plans, room dimensions.
  • Spatial relationships: object positioning and room layout connections.

Now, let’s see what data is contained in the 3D model produced by the technology. RoomPlan organizes scanned information into two primary categories: surfaces and objects.

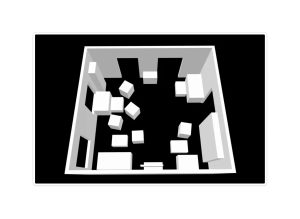
3D model scan of the larger room with more furniture

4 Surface Types & Their Data Properties

First, let’s elaborate on surface types, properties, and applicable metrics. RoomPlan identifies four distinct types of surfaces that define a room’s structural boundaries:

  1. Wall – primary structural boundary.
  2. Door – entry and exit points.
  3. Window – light sources and viewing areas.
  4. Opening – passages without doors.
Surface Type Description Detection Capability Relevance
Walls Vertical structural boundaries Precise positioning and dimensions Structural layout for AR navigation and space planning
Opennings Doors, windows, passages Type identification and measurements Traffic flow analysis and accessibility planning

Useful for layout planning, renovation

Floor Horizontal base surface Area calculation and boundaries Foundation for furniture placement and room use
Furniture Moveable and built-in objects Category, size, and spatial relationships Object interaction and interior design applications


Each of these surfaces contains a standardized set of six data properties. 


Data Property Description Data Type Notes
Confidence Detection reliability Discrete (Low/Medium/High) Indicates scan quality
Dimensions Size measurements Width × Height Depth always equals 0 (no thickness)
Transform Position and orientation 4×4 matrix Standard transformation matrix
Normal Surface direction 3D vector Perpendicular to the surface plane
Curve Surface curvature Variable/nil Nil for flat surfaces
Completed edges Scan completion status Array Tracks user scanning progress

15+ Objects & Data Properties

Apple RoomPlan API can detect a variety of objects, namely:

  • Furniture: bed, chair, sofa, table.
  • Kitchen appliances: dishwasher, oven, refrigerator, sink, stove.
  • Bathroom objects: bathtub, toilet, washer, dryer.
  • Other: fireplace, stairs, storage, television.

Objects share similar properties to surfaces but with key differences. 

Property values include confidence, dimensions, and transform.

  • 3D Dimensions: Full width × height × depth values.
  • Oriented Bounding Boxes: Match object orientation, not world coordinates.
  • Spatial Relationships: Position relative to walls and other objects.

Dimensions and the transform metric define a bounding box around an object. The bounding box isn’t aligned with the axes. Instead, it matches the object’s orientation, not the world coordinate axes.

Data Property Description Object vs. Surface Difference
Confidence Detection reliability Same discrete values (Low/Medium/High)
Dimensions Size measurements 3D values (width × height × depth)
Transform Position and orientation Defines a non-axis-aligned bounding box

As understood, RoomPlan API can detect and visualize many elements. Additionally, it cannot simply be visualized as plain boxes; however, you can replace them with real furniture models to make the scan more detailed and valuable.  

This structured method makes RoomPlan data ideal for creating top-notch AR apps, architectural analysis, and automated space planning.


Want to explore how the RoomPlan API can transform your project?

Let’s build a solution that goes beyond the RoomPlan API’s standard features and addresses its limitations. This custom solution creation uses an advanced computer vision algorithm. It enhances object recognition and layout accuracy, especially in cluttered or irregular rooms.

Reach out for a consultation.


Getting Started with the Apple RoomPlan API: Tech Perspective 

Developers can seamlessly use the RoomPlan API in their iOS apps using one of two approaches:

  • Basic integration: add a RoomPlan API with minimal effort and without customization. Users will interact with the built-in solution experience only.
  • Advanced integration: gain complete control over scanning parameters and real-time data processing. From this perspective, users can build detailed room plans and edit specific elements as needed.

Thus, the easiest way to integrate Apple’s RoomPlan API into your iOS app is by using the default RoomCaptureView in Storyboard.

RoomPlan follows a clear component hierarchy: 

Hierarchy of components included in RoomPlan API


The most straightforward integration uses the default RoomCaptureView for Storyboard.

  1. The RoomCaptureView handles all visualizations and interactions with the end user. 
  2. A user scans the room with RoomCaptureSession, accessed via the corresponding view’s property. 
  3. The RoomCaptureSession itself utilizes the standard ARSession from ARKit.

You might also find it interesting to read:

SDK for Augmented Reality Applications

How Do AR Solutions Benefit from RoomPlan API

When building AR apps and using the RoomPlan API, focus on how to streamline your business processes. 

According to Statista, revenue in the AR&VR market is expected to reach $46.6 billion in 2025. Companies are investing in AR technology because customers want to receive immersive and interactive experiences in their services.

Integrating Apple RoomPlan into your app improves development and user experience in several key ways:

  • Reduce software development time by more than 50% with this unique iOS technology.
  • Generate 3D floor plans in under 2 minutes.
  • Offer intuitive room capture in real estate, interior design, or AR apps.
  • Cut the need for specialized 3D modeling expertise on your team.


“RoomPlan integration cuts our MVP development cycle from 4 months to 6 weeks. We could focus on user experience and advanced functionality instead of building a scanning solution from scratch.” 

– Yurij Gapon, Head of iOS at It-Jim

We can help you test the RoomPlan API integration in your project and ensure accuracy in real-world conditions, such as varying lighting and complex furniture setups.

You can also discover our

3D Computer Vision Services


The true strength of using the Apple RoomPlan API is not only in its scanning features. It also provides valuable business insights.

Here’s how RoomPlan translates technical capabilities into competitive advantages:

1. Faster Time to Market

Scan-based 3D room models eliminate the need for manual drawing, significantly speeding up product release timelines. 

Teams can now iterate and deploy features in just days. There is no need to wait weeks for professional architectural drawings. There is no need to use CAD programs and similar tools and to hire an external expert for measurements.

2. Improved App Experience

Integrating RoomPlan into your iOS app offers an immersive AR experience, enabling engaging and personalized interactions. This creates engaging, personalized experiences. They feel real and fit into the actual environment, not just a theoretical space. 

Users interact with real-world spatial data instead of static, generic layouts. Planning renovations, arranging furniture, or evaluating properties all become easier and more intuitive.

3. Optimized Processes

RoomPlan API streamlines floor plan creation by automating the process, reducing manual effort, and minimizing errors. It’s a valuable tool for professionals who need fast, reliable, and accurate results.

4. Data-Rich Outputs

RoomPlan output provides detailed object metadata, including:

  • Type classification.  
  • Precise positioning.  
  • Accurate dimensions.  
  • Spatial relationships.

This structured data is directly integrated into analytics pipelines, AI training datasets, or modeling applications. There’s no need for extra processing.

5. Ready-to-Export Formats

The API provides seamless workflow integration with various export options:

  • USDZ files for AR apps.
  • Structured JSON for BIM/CAD tools. 
  • Standard formats for cross-platform use.

Building AR Apps with Apple RoomPlan: It-Jim Experience 

Our team has rolled out the RoomPlan API in various industries. This adoption change enables businesses to tackle spatial computing challenges in innovative ways.

Here are proven applications that we helped to implement:

Architecture: 3D Floor Plan Layout  

Project Focus: The goal was to create precise 2D floor plans and 3D layouts of real spaces with actual dimensions.

Solutions: A system captures spatial data from iPhone LiDAR scans. Then, it creates 3D models and scaled 2D floor plans.

Result: A mobile app turns spaces into digital layouts in minutes. This outcome saves architects and real estate professionals a whole day of manual work.

Solution for Real Estate

Challenge: Our solution creates 3D room models to facilitate the buying and selling of real estate. A client requested that our team enhance their prototype, which was created using the Apple RoomPlan API. They also requested support to improve app functionality.

Solution: We developed a tool that creates 3D room models to help with buying and selling real estate properties. 

Furniture Fitting AR App

Challenge: Customers struggled to see how furniture would look in their own spaces. This aspect caused high return rates and unhappy customers.

Solution: We developed an AR app using the Apple RoomPlan API, which enables users to place furniture in real-time with precise spatial awareness. Users scan their room once, then virtually place items with confidence in scale and fit.

“After It-Jim added RoomPlan to our property management platform, we cut manual surveying costs by 70% and improved accuracy. Property listings now include interactive 3D models generated in minutes, not days.” 

– Feedback from our client. 

Therefore, RoomPlan API integration makes a solid investment. The technology offers businesses chances to stand out. It helps them create a better user experience and visual materials with less effort.


Have an AR-based project concept in mind and want to use the RoomPlan API? 

Let’s build it together with Apple RoomPlan technology and advanced computer vision expertise. We help you turn powerful technology into real-world solutions that deliver results with a proven track record of implementing the RoomPlan API in iOS apps across diverse industries. 

Book a call to discuss the implementation strategy.


Overcoming Apple’s RoomPlan API Limitations 

Note that RoomPlan is still a new API. Some things may change, and issues might get fixed in future updates. 

However, RoomPlan delivers useful but not perfectly accurate results. Measurements and object positions may have minor errors, which is excellent for quick scans but not reliable for precision-oriented tasks.

Since our team has had an immersive experience with the Roomplan API, we’ve identified its key limitations and know how to work around them.

How we work with existing API limitations, read also:

RoomPlan is Awful, and it’s Great!

For example, the RoomPlan framework has significant constraints, including the requirement for rectangular simplifications. The system attempts to reduce all objects and surfaces to a set of rectangles. 

Additionally, the technology does not capture data from ceilings or skylights.

Limitation of Apple RoomPlan API examples with a window and a door

The current version of the RoomPlan API in iOS has several constraints, such as:

  • Limited object recognition – detects only a fixed set of common household items (e.g., chairs, tables, sofas). It does not identify less typical objects, such as water boilers or industrial equipment.
  • Struggles with multiple or large rooms – not designed for scanning numerous or very large spaces in one go. Apple recommends a maximum of about 9×9 m (30×30 ft). Longer scans degrade tracking accuracy, risk overheating, and may lead to drift.
  • Measurement Errors – shows measurement drift—errors up to ±5 cm per wall.
  • Incorrect Wall Thickness – models all walls as a uniform thickness of around 16 cm, regardless of real measurements. Exterior walls are always that thin; structures over ~50 cm break into two separate thin walls.
  • Door & Window Flaws – merge double doors or door-window combinations incorrectly.
  • Mirrored Surface Issues – large mirrors and mirrored wardrobes can confuse LiDAR, leading to missing geometry or phantom objects.
  • Surface shape limitations – assume surfaces are rectangular or slightly curved, so it misrepresents angled walls, arched openings, or detailed trim.
  • Phantom (ghost) geometry – occasionally “sees” surfaces or objects that don’t exist; LiDAR noise can lead to phantom walls or objects.
  • No Ceiling or skylight capture – does not capture ceilings or skylights, making it unsuitable for tasks requiring lighting design or accurate volume measurements.

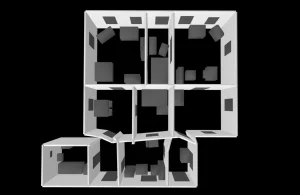
RoomPlan API exteme case of scanning the whole house at once


While powerful, RoomPlan isn’t perfect in every environment. With years of vision-based R&D, we know how to work with these and other limitations.

Apple continuously improves RoomPlan API capabilities with each iOS platform update. Our AI iOS development services and approach account for this evolution.

“We are leveraging new RoomPlan features as they’re released. Our clients enjoy Apple’s upgrades while keeping current features intact. This is the benefit of working with a team that knows the framework’s roadmap and even beyond.” 

– Yurij Gapon, Head of iOS at It-Jim

Conclusion: Is Apple’s RoomPlan API Right for Your Project? 

Apple’s RoomPlan API simplifies the creation of accurate 3D room models. You can use it with a LiDAR-enabled iPhone or iPad.

It simplifies floor plan creation, reduces errors, and enhances app features across various industries, namely:

  • Real Estate: virtual property tours and instant floor plan generation.
  • Interior Design: AR-powered furniture placement, estimating materials, and space planning.
  • Retail: store layout optimization and virtual showrooms.
  • Property Management: digital twin creation and facility maintenance.
  • Architecture: rapid as-built documentation and renovation planning.
  • and much more.

Its ability to quickly generate accurate room layouts also makes it a valuable asset for broader AR applications. The technology is excellent for:  

  • Fast residential room scans within ~9×9 m.
  • Quick, parametric 3D models and object layouts.

What’s Next: The RoomPlan API is still new, but updates will improve its accuracy and stability. 

In the future, we can look forward to improvements such as support for non-rectangular surfaces, scanning multiple rooms, and better detection of floors and ceilings. These upgrades will expand the capabilities of what we can achieve with spatial understanding in AR.

Please note: The technology is not suitable for high-precision needs, complex structural analysis, industrial settings, or multi-floor scanning.


Ready to advance your business with the RoomPlan API and computer vision?

We help you benefit from the RoomPlan API. We do this by testing, customizing, and integrating it into your iOS app. Contact our team to share your needs and find out how we can speed up your RoomPlan implementation.

Lecture: Introduction to Computer Vision

As part of the Guest Edu project of Kharkiv IT Cluster, our Chief Learning Officer Serge Yerin will deliver his talk on Introductory to Computer Vision and tell you about:

✅ what Computer Vision is and its role in the AI field,
✅ real-world cases and its applications,
✅ the main tasks a CV engineer faces and the means to solve them,
✅ where to start if you want to study and work in CV

📅 September 28 | 12:00
🌐 Online | Zoom
📝 Registration | https://forms.gle/hVDKFQSaKyuH8n26A

Register for the webinar now to get a head start on IT tomorrow!

Computer Vision: What’s under the Hood

As Artificial Intelligence enthusiasts, we are always happy to support innovative activities and motivate youth to self-develop in the domain. This time we are contributing to the IASA Data Science champ – an online team competition for students interested in Data Science, Machine Learning, Deep Learning, and Artificial Intelligence, organized by IASA Student Council and hosted by Igor Sikorsky Kyiv Polytechnic Institute.

The lecture days of the event will include a talk by our Chief Learning Officer Serge Yerin – he will dive into what is under the hood of Computer Vision and how to start a career in this field 😉

Computer Vision Trainee Program 2022

The program is a perfect match for:
🎓 engineering and computer science  students
💻 software developers who want to switch to the CV / ML / DL domain

It lasts up to 2 months and gives you a chance to work on a real CV project under the personal guidance of one of the best It-Jim experts.

At the end of the program, successful candidates will have the opportunity to continue working at the company 🤝

🔥 Apply with the form by September 23, 2022

Writings on the Wall: Recognizing Speech on Spectrograms

If you’ve ever come close to anything related to audio or other signal processing, you likely already know about spectrograms. Those fancy-looking and usually colorful plots are commonly used to represent a spectrum’s change over time. But can they provide us with some higher-level information about, let’s say, human speech? What if I told you that one could effectively get a transcript of a speech recording just from its spectrogram? Well, if you think that this is rather an exaggeration, you’re absolutely right. Yet, recognizing certain phonemes and even making educated guesses about specific words based only on their spectrograms is perfectly possible. Thus, let’s dive deeper into this topic and learn a thing or two about human speech on our way.

Power-Source-Filter Model

A common way to represent human speech is a so-called Power-Source-Filter model. The Power here refers to the lungs where an air flow originates, vocal cords are the Source of vibrations and everything above them (the vocal tract) serves as the Filter for those vibrations.

We can ignore the Power component for our current goal and focus only on the Source-Filter part. Using more accurate terms than just “vibrations,” the Source produces harmonic waves with a fundamental frequency depending on the voice pitch. The Filter then either amplifies or suppresses specific harmonics. Peaks on the filter’s frequency response are called formants and are denoted as F1, F2, etc. (from lower to higher frequency).

The Filter is considered linear, i.e. a current sample is approximated as a weighted sum of n previous samples. Given a speech recording, one can estimate coefficients of the Filter using a Linear Predictive Coding (LPC) technique and then use them to find the frequency response curve. We need this curve (specifically its formants) to help us recognize certain phonemes.

Vowels

Phoneticians distinguish a set of 8 “cardinal vowels”, with each one being defined by a specific position of a tongue’s highest point while pronouncing it:

If we plot the highest point positions for each cardinal vowel together, they’ll form a specific figure:

If we make the same plot for frequencies of the first two formants (F1 and F2), it will look remarkably similar:

The match isn’t perfect, of course (just as my pronunciation of the cardinal vowels, from which the formants were obtained), but it is still close enough. It leads to a couple of conclusions. First, even though the model with just the linear filter might look over-simplified, it bears direct correspondence with movements of the vocal tract. Second, the frequencies of the formants (usually two or three) are unique for each vowel and can be used to distinguish them.

To observe this, we can create a plot of a speech recording that is similar to a spectrogram but with the Filter’s frequency responses used as its columns instead of spectrums. Formants on this kind of plot are seen as bright horizontal lines. If we build it for a recording of several different vowels, it is evident that formants are indeed uniquely positioned for each of them:

Let us remember this plot for a future reference and move on to consonants.

Consonants

Unfortunately, there is no unique descriptor for each consonant, unlike formants for vowels. Instead, we can categorize consonants and use this classification to narrow down a list of possible options when trying to recognize a particular phoneme.

To analyze consonants, we need to pronounce them between two vowels, which makes them better defined on spectrograms. So, all examples were pronounced with two [a] sounds, like [apa], [ada], etc.

Arguably the most important category split is voiced and voiceless consonants. While pronouncing voiced ones, vocal cords still vibrate; thus, we can observe some harmonics. During voiceless ones, the vibration is absent, and harmonics are entirely interrupted. As evident from the following plot, while all consonants do look like “gaps” between vowels, voice ones ([b] and [d]) still leave some harmonics uninterrupted:

Fricatives can be recognized by a characteristic noise. Furthermore, the distribution of the noise along the spectrum can help to distinguish them from each other:

The frequency response can be helpful for consonants too. For instance, nasal consonants have a specific noise that is better observed on this kind of plot:

Trilled consonants ([r] in this case) can be easily spotted too by a very characteristic vertical pattern:

Some other features can help recognize consonants; however, they are more advanced and often harder to spot, so we’ll leave them out of scope for now.

Reading Words

Now, when we’ve learned to recognize different phonemes, why not try to do something more remarkable, like reading an actual word from a spectrogram? Here is one, with its spectrogram and corresponding frequency response plots:

We can immediately identify three separate vowels. Just by looking at the reference of different vowels that we’ve prepared earlier, we can pick the ones that look the most similar:

The second noticeable thing is three fricatives that can be identified by their noise using another reference from earlier:

Now we have just three missing phonemes. The first one can be easily recognized on the frequency response plot as a trilled consonant, with [r] being the only possible option in English. The second one is somewhat hard to identify, so we’ll skip it. Finally, the last missing one can also be identified on the frequency response plot as a nasal consonant (either [n] or [m]). So, here are our final predictions:

We still have one unknown consonant and ambiguity regarding another one, yet what we’ve discovered is enough to “brute force” the word, which is obviously “frequency”.

Conclusions

So, we’ve learned to recognize some phonemes on spectrograms. That is something you could brag about to a very limited number of people who would actually consider it cool but are there any practical applications to all this knowledge?

First, if you’re building any kind of speech processing pipeline with spectrograms as its inputs, you now know about features to look for and can tune spectrogram parameters to highlight them better. Or you can even use frequency responses for additional features. Also, if you have a speech-generating model (especially a black box one, like a neural network) and its output sounds wrong, you could compare its spectrogram to an actual speech and try finding the source of your troubles. And finally, what we’ve discussed in this post is present in many classic speech processing methods. Linear Predictive Coding, for example, is used for voice compression (like earlier versions of GSM), speech synthesis, speech encryption, audio codecs, etc. And it is always good to know the basics, even when working with much more advanced stuff.